개발
-
디스코드 봇
cd ~/discordbot
python3 -m venv venv && source venv/bin/activate
python bot.py
1. 가상환경·경로 확인
bash복사편집
/home/ubuntu/discordbot/ ├── venv/ # python -m venv 로 만든 곳 └── bot.py다른 위치·사용자라면 경로·User 항목만 맞춰 바꿔 주세요.
2. 서비스 유닛 파일 작성
bash복사편집
sudo nano /etc/systemd/system/discordbot.serviceini복사편집
[Unit] Description=Discord Party Bot After=network.target [Service] # 봇을 실행할 리눅스 계정 User=ubuntu WorkingDirectory=/home/ubuntu/discordbot # 가상환경 파이썬으로 bot.py 실행 ExecStart=/home/ubuntu/discordbot/venv/bin/python /home/ubuntu/discordbot/bot.py # 표준 출력·오류를 journald 로 StandardOutput=journal StandardError=inherit # 프로세스가 죽으면 10초 후 자동 재시작 Restart=always RestartSec=10 [Install] WantedBy=multi-user.target저장 → Ctrl + O, Enter → Ctrl + X 종료
3. systemd 에 등록·시작
bash복사편집
sudo systemctl daemon-reload # 유닛 새로고침 sudo systemctl enable discordbot # 부팅 시 자동 실행 sudo systemctl start discordbot # 지금 즉시 실행상태·로그 확인
bash복사편집
sudo systemctl status discordbot # 실행/에러 상태 journalctl -u discordbot -f # 실시간 로그 tail
4. 코드 업데이트 시 재시작만 하면 됨
bash복사편집
# git pull 또는 파일 수정 후 sudo systemctl restart discordbot
5. 환경변수(.env) 위치 주의
.env가 WorkingDirectory 안에 있으면 그대로 읽힙니다.- 만약
/etc/environment같은 전역 환경변수를 쓰고 싶다면
서비스 유닛에Environment="DISCORD_TOKEN=..."줄을 추가할 수도 있습니다.
-
qer.kr
sudo systemctl restart flask-check
-
php 세션 디스크 부
sudo find /var/lib/php/sessions -type f -mtime +1 -delete
크론탭 추가
0 8 * * * find /var/lib/php/sessions -type f -mtime +1 -delete
🧠 설명:
0 8 * * *→ 매일 오전 8시 0분 실행find /var/lib/php/sessions→ 세션 파일이 저장된 디렉토리-type f→ 일반 파일만 대상-mtime +1→ 1일 이상 지난 파일만 삭제-delete→ 삭제 실행
이렇게 하면 전날 이상된 오래된 세션 파일만 정리됩니다.
-
우분투 자동 실행
/etc/systemd/system/update.service
더 보기: 우분투 자동 실행[Unit] Description=Flask Update Server for Yong After=network.target [Service] User=ubuntu WorkingDirectory=/var/www/html ExecStart=/usr/bin/python3 /var/www/html/yong/update.py Restart=always [Install] WantedBy=multi-user.target✅ 2. 서비스 등록 및 자동 실행 설정
bash복사편집
sudo systemctl daemon-reexec sudo systemctl daemon-reload sudo systemctl enable update.service sudo systemctl start update.service
✅ 3. 상태 확인
bash복사편집
sudo systemctl status update.service -
리틀리 가져오기
<?php
header("Content-Type: text/html; charset=UTF-8");

// 외부 페이지 URL
$url = "https://litt.ly/yongsan";

// cURL로 외부 페이지 요청
$ch = curl_init($url);
curl_setopt($ch, CURLOPT_RETURNTRANSFER, true);
curl_setopt($ch, CURLOPT_FOLLOWLOCATION, true);  // 리디렉션 따라감
$html = curl_exec($ch);
curl_close($ch);

// 결과 출력
echo $html;
?>
1:3 배치
<!DOCTYPE html> <html lang="ko"> <head> <meta charset="UTF-8"> <title>용산초 링크 & 급식</title> <style> body { margin: 0; padding: 0; font-family: sans-serif; } .container { display: flex; height: 100vh; } .left { flex: 1; border-right: 1px solid #ccc; overflow: hidden; } .right { flex: 3; overflow: hidden; } iframe { width: 100%; height: 100%; border: none; } </style> </head> <body> <div class="container"> <div class="right"> <iframe src="https://qer.kr/yongsan-proxy.php"></iframe> </div> <div class="left"> <iframe src="https://qer.kr/lunch.html"></iframe> </div> </div> </body> </html> -
파이썬 설치
pip install python-wordpress-xmlrpc requests beautifulsoup4 lxml –break-system-packages
오라클 클라우드 우분투에서 pip로 설치시 에러뜰때.
python3 -c “from wordpress_xmlrpc import Client; import bs4; import requests; print(‘✅ OK’)”
설치 후 확인
xmlrpc.php
워드프레스 자동 포스팅용
급식용
import requests
from bs4 import BeautifulSoupurl = “https://school.jbedu.kr/yongsan4u/M010304/”
res = requests.get(url)
soup = BeautifulSoup(res.text, “lxml”)date = soup.find(“ul”, class_=”tch-lnc-date”).get_text(strip=True)
줄바꿈 처리된 급식 메뉴 추출
meal_items = soup.select(“dd.tch-lnc li”)
if meal_items:
data = “
“.join([item.get_text(strip=True) for item in meal_items])
else:
no_data = soup.find(“div”, class_=”tch-no-data”)
data = “급식이 없습니다.” if no_data else “정보를 불러오지 못했습니다.”html = f”””
오늘의 급식🍱 오늘의 급식
{date}
{data}
“””with open(“/home/ubuntu/www/lunch.html”, “w”, encoding=”utf-8″) as f:
f.write(html)워드프레스 업로드
from wordpress_xmlrpc import Client, WordPressPost
from wordpress_xmlrpc.methods.posts import NewPost
import datetime1. 워드프레스 로그인 정보 설정
wp_url = “https://xmlrpc.php”
wp_username = “”
wp_password = “”
client = Client(wp_url, wp_username, wp_password)2. HTML 파일 읽기
html_path = “/var/www/html/lunch.html”
with open(html_path, “r”, encoding=”utf-8″) as f:
html_content = f.read()3. 오늘 날짜 가져오기
today = datetime.date.today().strftime(“%Y-%m-%d”)
4. 워드프레스 글 작성
post = WordPressPost()
post.title = f”{today} 급식 정보”
post.content = html_content
post.post_status = “publish”
post.terms_names = {
‘category’: [‘급식’],
‘post_tag’: [‘점심’, ‘학교’]
}5. 업로드 실행
client.call(NewPost(post))
print(“✅ 워드프레스에 급식 정보 게시 완료!”)크론탭
crontab -e
30 8 * * 1-5 /var/www/html/run_lunch.sh >> /var/www/html/lunch_log.txt 2>&1
월 금 8:30 시행
-
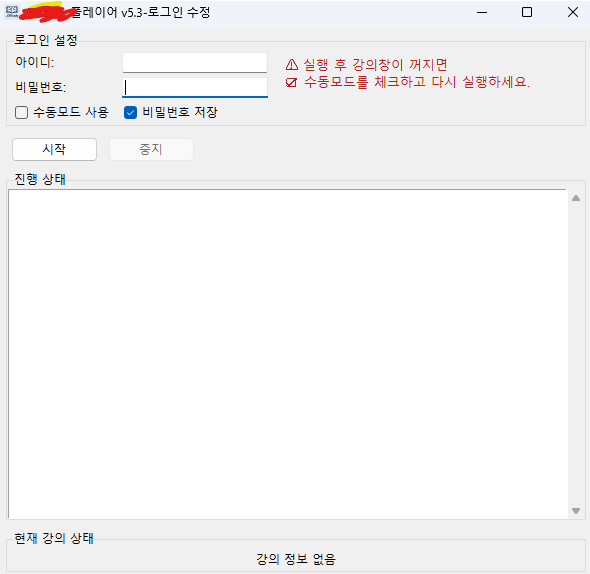
연수 버전
5.4로그인 및 팝업 수정(수동 모드 작동시 잘됨. 자동은 테스트중)5.5팝업 및 최초 학습 수정5.7학습목록수정
현재 버전
5.7
-
php.ini
오라클 클라우드
업로드 용량 설정
php 8.2 기준
sudo nano /etc/php/8.2/fpm/php.ini
upload_max_filesize = 2M
post_max_size = 8M
memory_limit = 128M
max_execution_time = 30
128M, 256M으로 수정
sudo service php8.2-fpmrestart
sudo nginx -t
sudo service nginx restart
-
알비온
파이썬
-
연수
파이썬